Simplicity 2457 Baby's Christening Outfits: A Pattern Review
- Kat Zimmermann
- Jun 2, 2023
- 6 min read
Updated: Jul 22, 2024

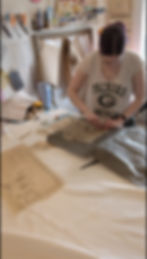
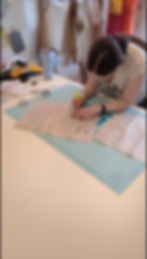
If you follow me on TikTok, Instagram, or Facebook, you may have seen the montage video of me working up this pattern. I've only made this pattern once, for my son (version C as we'll discuss below), but I have some important notes for anyone else looking to use this pattern.
A quick note that this is one of only three baptism patterns I was able to find that included rompers for the boys. The pattern from McCalls seems to have been discontinued, making the two Simplicity patterns the only easily accessible options for purchase.
I will also make a general note that I did not make the bonnet at my husband's request.
Total time to complete: About 2-3 hours to cut out the pieces, about 8-12 hours to sew it up, depending on sewing speed*.
*Note: I'm really ballparking this number as this was completed in chunks of stolen time while caring for my son over the last month of my maternity leave.
Materials:
Fabric - fabric choices discussed below - amount varies a bit with size but you can safely purchase 2 yards and have a bit left over.
You will need a second fabric to make the slip for the dresses (version A and B) or to make the vest in version C (shown in my pictures)
Snap tape
Ribbon
Elastic (for shoes)
Bias tape (for inside of the collar)
Buttons
Middy braid (for versions C and D - I skipped this in favor of using an embroidery stitch in a contrasting thread)
Sewing machine
Universal sewing machine needle of a weight to match your fabric
Matching thread
Fabric scissors and snips (or a rotary cutter and mat, if that's what you prefer)
Optional: Fabric marking tool for transferring the pattern - I use Saral transfer paper in various colors with a tracing wheel
Optional: Fabric marking tool (chalk, pencil, pen, fabric marker) if you prefer to cut out your patterns and trace onto the fabric
Optional: pattern weights
Sewing pins or clips
Ironing board and iron
See the pattern sleeve as well - different versions need additional/different notions.
The pattern itself can be purchased here directly from Simplicity or from any local retailer (assuming it's in stock). I bought this pattern on Amazon from a 3rd party seller as the local stores didn't have it in stock.
Notes and Thoughts on the Pattern
(READ THE PATTERN FIRST) I cannot stress this enough: whoever wrote the instructions for this pattern cared more about saving paper than making sense. Versions A and B go first and then the instructions for versions C and D refer you back to those instructions several times, but only for a few steps here and there and the referrals are in small print - easy to miss if you're not paying close attention.
So before you begin working, I HIGHLY recommend going through the entire pattern and highlighting anywhere it says "continue same as Dress A, B, see steps..." and then going into the instructions for versions A and B and circling or highlighting those steps. Look for this after steps 6, 19, and 26 in versions C and D.
I also recommend highlighting anywhere there is a 3/8 inch or 1/4 inch seam instead of the standard 5/8 inch used throughout the rest of the pattern.

(Pin tucks) Pin tucks are used for both the romper and dress versions of this pattern right at the beginning. I struggled a bit getting a straight line here even though it seemed straight at the ironing table. My best piece of advice is this: use an EZ Hem if you have one or a metal ruler if you don't. Anything that can withstand the heat of the iron without melting to give you that perfectly straight line is a good idea as even the slightest amount of wavering will be noticeable when the tuck is finished.
(Odd requests) There is something to be said for working with very small pieces cut for baby clothing - it sews up quick. However, it also means you can't always depend on your typical methods for sewing. For example, when working on the sleeves, you will not be able to fit the entire sleeve around the sewing machine in order to hem them. I wasn't even able to fit the sleeve around my tailor's sausage to press the sleeve hems and instead had to settle for finger pressing and aggressive hem clipping. Be prepared to make adjustments to the instructions to allow for the real world.
(A&B steps 14 - 17) Again, whoever wrote the instructions cared more about saving paper than making sense. I read these instructions so many times and still ended up ripping out all my stitches and doing it twice. I'll be honest here, I'm still not convinced I did it correctly.
The goal for these steps is to form a facing and, once the collar is attached in steps 24-28, hide all the raw edges away within it. The most important thing I figured out is that LEFT means the garment's left side when the RIGHT side of the fabric is face UP. So imagine the child is wearing the garment and you are looking at their back. LEFT means the child's LEFT.

(Snap tape) The snap tape is only used for versions C and D to close the bottom of the romper. Two pieces of advice here. First, use a zipper foot to get nice and close to the edge of the snap tape. It says this in the instructions and you really do need to change the foot. Second, after stitching on one side of the tape in step 16, snap the second half of the tape in place onto the first side before you pin. I ended up needing to include a small jog on one side of the pants to make it fit.
Notes and Thoughts on Materials
(Fabric Choice) There are quite a few options for recommended fabrics from the pattern envelope: laundered cottons, broadcloth, damask, eyelet, crepe, laundered silks-rayons, silk linen, batiste, voile, brocade, satin, shantung, taffeta, soft lightweight linen and linen blends.
The key word here is "laundered" - ALWAYS prewash your fabrics but especially prewash your fabrics when they will be worn by a child. I used a linen my mother had sitting around and that worked well. I do recommend going for something with a little bit of structure as it will hold the pleats well and be stiff enough for the shoes and bonnet.

(Middy Braid) This is written into the pattern for both versions of the romper. However, you may notice it is not included in any of my photos. This is because I forgot to buy it, followed by a conscious decision to not include it because I didn't want to go to the store. Instead, I used an embroidery stitch on my sewing machine in a royal blue thread and I quite like the way it turned out. This is definitely an option if you also choose to forego the middy braid. Of course, you can also just skip the decoration altogether and opt for a cleaner look.
The Final Verdict
Would I recommend this pattern? Yes, with some qualifiers.
First, the way the pattern is written was confusing and I struggled to complete some of the steps. As such, I would not recommend this pattern to anyone who would self-identify as a beginner - either a beginner sewist or a beginner to using paper patterns.
Second, some of the techniques used are quite fiddly either because of the garment size or just in general. So again, if you have experience using paper patterns, following instructions, and sewing in general, you should be fine.
Third, this was literally one of two baptism patterns I was able to find that I could easily purchase that had a romper version. So while I'm still overall pleased with how it turned out, I can't say for certain that I would have picked it over other options.

How are your New Year's resolutions coming? We're just about halfway through the year and I've already broken mine (lol). I'll be moving to a monthly post instead of trying to push out content every 2 weeks because, believe it or not, caring for an infant makes it really difficult to find the time and mental space to sit down and craft then write about it - who knew?
In the interim, you can follow me on TikTok, Instagram, and Facebook for content between posts. Make sure to also follow the blog by filling out the form below so you don't miss a post - see you next time!

