How to Make a Baby Wrap Carrier
- Kat Zimmermann

- May 6, 2023
- 8 min read
Updated: Jul 22, 2024

It's been a while since my last post, but now I'm back with my son who is now just about 3 months old (!!) as I write this. If you follow me on social media, you know I've been doing a lot of baby content recently - this will continue as we hit our stride as a new family.
A baby carrier is a must for any new parent hoping to be able to move about the house without their arms falling off. I started my baby wearing journey with two options: the KeaBabies wrap carrier (gifted to me) and the Baby Björn mini carrier (purchased on Marketplace for $20).
The KeaBabies carrier is comfy but HOT - my son and I are always covered in sweat after a carrying session, even though the house is a cool 65° F. I also find that, because of the stretch in the fabric, he slowly sinks down and moves around which is not great for protecting his back. It also means I have to tighten the carrier fairly often. The baby also does not like having his head covered by the fabric on the sides and will yell about it if he starts to wake up.
The Baby Björn mini carrier I have is made of a mesh fabric and so has the advantage of being more comfortable temperature wise. My husband likes this carrier because it's easy to get on and has a secure hold. That said, my son isn't wild about it because the shoulder straps prevent him from keeping his arms next to his face meaning he can't suck on his fingers. My biggest issue with this carrier is that I can't put it on without putting the baby down first. So if he's sleeping already, good luck getting him back to sleep because now he's tired AND fussy from being put down.
The solution? A wrap carrier made from a breathable woven fabric. This carrier can be made and worn by anyone, doesn't cause me or the baby to overheat, and secures the baby in place very well. With a front wrap cross carry (FWCC), his head is held in the center without needing to be covered which he greatly prefers. However, I can still use the sides to hold his head to my chest if needed.
So, let's make a carrier!
Q: What materials do I need to make a carrier?
A: To make a wrap carrier, you will need:
Fabric (see notes below for what types and how much fabric to purchase)
Matching or contrasting thread
Pins and/or hem clips
Iron and ironing board
Fabric scissors and/or rotary cutter with cutting mat
Hem gauge or ruler
Notes

(Wrap Sizing) The length of the wrap depends on the size of the wearer as well as the size of the child. The "standard" wrap carrier tends to be between 5 and 6 yards in length. If you've already tried a wrap carrier, I recommend looking up the size of that brand and using that information to make your decision. Also consider where you prefer to tie the wrap. I like to tie it in front so I can sit comfortably, meaning I need that extra yard of fabric. The wrap shown in the images is 6 yards total. Note that my husband cannot get the wrap around to his front and must tie the knot at his back instead.
If you haven't used a wrap before, I recommend grabbing a long piece of yarn or string and "wrapping" it around your body. Then, measure the yarn and add a yard for good measure.
With respect to width, most wraps are 20-30 inches wide with some being extra wide. Width is personal preference but you also want to make sure you have enough fabric to go from tucked under baby's bottom up to their neck. My wrap is 20 inches wide finished.
(Fabric Fiber Content) Choosing the fabric is the most important part of this project. At least, it was for me. There are 3 factors to consider: breathability, moisture wicking, and strength.
Breathability and moisture wicking seem like they will be the same thing. However, it's important to consider them separately. For example, cotton is very breathable but holds onto moisture for long periods of time (think cotton t-shirts in the summer). On the other end of the spectrum, we have poly-blends made for athletic wear which tend to wick away moisture well but don't necessarily breathe which can cause the wearer to overheat (this is purposeful for some winter athletic clothing). If you want the best of both worlds, linen and lyocell are personal favorites.
Strength mostly comes down to the fabric's weight and density of the weave. If you're making a woven wrap, you don't want the fabric to stretch except for a bit along the bias. If you prefer a wrap with some stretch, consider how much stretch will still feel secure around your baby. I would not recommend anything more than a 25% stretch in either direction. If you're not sure what kind of fabric will feel secure, consider going in person to handle the fabrics by pulling and stretching at them. Remember that you want the wrap to continue to work for several years so it needs to be sturdy!
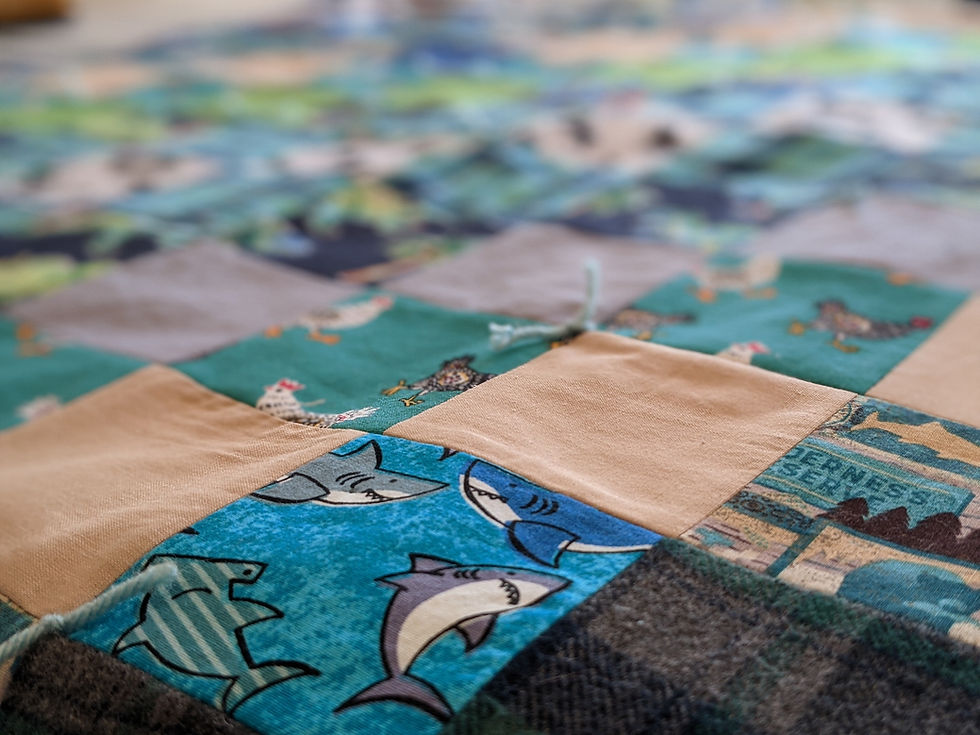
My wrap is made of a cotton-linen blend with a somewhat coarse weave, making it lightweight, sturdy, and breathable. The blend with cotton made the fabric affordable at my local sewing shop where it was on sale (I got 4 yards for less than $30!).
(Woven vs. Stretch Fabrics) This comes down to personal preference on two fronts: how you want to wrap the baby and what feels most comfortable/secure.
There are many ways to wrap a baby in a carrier - all are effective when done properly. The two most common ways are:

Pocket Wrap Cross Carry (PWCC) - This is the most common carry for stretchy wraps and is what is typically included in their instruction books. It's also the most common how-to video on YouTube although it's not often named as PWCC. This wrap doesn't work well for woven wraps since it relies on the fabric stretch to bring the "pocket" up over baby.

Front Wrap Cross Carry (FWCC) - The simplest (in my opinion) way to wrap a baby with a woven carrier. You can use this wrap method for stretch wraps as well, but it's not as secure as the PWCC. Great for warmer weather as you can wrap it so the baby only has one layer of fabric over their back.
Consider which way will work best for you before making your fabric choice. If possible, borrow a wrap from a friend or go to a local store that will let you try both methods with each type of wrap. Decide which makes your baby feel secure against your body as well as which method seems do-able to you.
(How much fabric to purchase) Once you've decided how big to make the wrap and what kind of fabric you want to use, all that's left is a little bit of math. There are two ways to do this:
The fabric's width is double (or more than double) the wrap width: Here, you can buy HALF the length of the wrap as you'll be able to cut the fabric down the middle to make two long rectangles then sew them together (shown in the tutorial below). For a 6 yard wrap, buy 3 yards of fabric.
The fabric's width is LESS than double the wrap width: In this case, you'll need to buy as many yards of fabric as you want the wrap to be long. For a 6 yard wrap, buy 6 yards of fabric. You may need to trim down the width before you begin to sew.
(Checking your Fit) Once you have baby all wrapped up, go through the TICKS checklist to make sure your baby is safely positioned:

Tight - baby should be snug against your chest with no loose fabric.
In view at all times - you should always be able to see baby's nose and make sure they can easily breathe by glancing down, even if you use the side of the wrap to hold their head in place.
Close enough to kiss - baby should be high on your chest with their head as close to your chin as is comfortable (for me, this means touching my collarbone). You should be able to kiss baby's head without straining your neck. Be aware that baby ride up a bit higher when you sit down.
Keep chin off the chest - baby's chin should be away from the rest of their body and you should be able to fit 2 fingers under their chin. Remember, baby's chin tucking in can restrict their breathing and cause distress with no warnings.
Supported back - baby's back should be in a slightly curved position with their tummy and chest snug against your body. Baby's knees should be higher than their bottom, making an M shape (use a mirror and your hands to check) and wrapping their legs around your body. When their legs are adjusted, you'll feel their spine curve. You can see this gentle curve and the M shape of the legs in the picture above.
How to Make a Wrap Carrier
(Step 0) Prewash and dry your fabric, following your regular laundry routine. If your fabric will fray a lot in the washer (e.g. linens or loosely woven fabrics), consider basting across the cut edges before washing.

(Step 1) Prepare the fabric for the wrap by cutting it to size. Depending on the width of your fabric (see note above), this will either mean trimming down the width of the entire piece of fabric or cutting down the center of the fabric all the way to make two rectangles.
Since the piece of fabric you're cutting is quite large, you can make this easier by carefully folding the fabric in the direction parallel to your planned cut (selvedges overlapping). If you're cutting the fabric in half, you can use the deep fold from the fabric being on the bolt as a guide.
(NOTE) If you are using one long piece of fabric, skip steps 2 and 3. Find the center of your carrier and attach a piece of ribbon or scrap fabric in a contrasting color so you'll easily be able to find the center when ready to wrap baby. You can also mark this with a permanent marker if needed (may come out in the wash).
(Step 2) Sew the two long rectangles together at their short ends in a strong French seam. To do this:
Begin with the WRONG sides together and stitch. Stitch again about 1/8 inch away from the first seam. Trim the seam.
Turn the fabric so it is RIGHT sides together with the seam off to one side and press. This should encase the trimmed edge in a little fabric sandwich.
Stitch with the right sides together 1/2 inch from your pressed edge. Stitch again 1/8 inch away from this seam.


(Step 3) Secure the French seam. From the wrong side of the fabric, press it to one side and topstitch to secure. This will keep it flat and prevent the seam from irritating baby's skin.
(Step 4) All around the edges of the carrier, create a double fold hem:
Fold and press in 3/8 inch all the way around. Then fold over a second time and press in 1/2 inch all the way around.
In the corners, create a mitered finish by folding in a triangle at the corner of the 3/8 in fold and then folding in the 1/2 inch fold straight across on both edges.


(Step 5) Wear your baby!

Did you make this wrap? Share out your photos and tag me @craftematics on your favorite social media! You can follow me here on the blog by filling out the form at the bottom of the page and get lots of extra content between posts by following me on TikTok, Instagram, or Facebook!
Don't forget your sun protection 😎


Springfeld lllinos
Hooray for woven linen and lyocell--my two most favorite fabrics! I got on a long flight last year and in the row ahead of me, a couple got on with their very young baby: I tried not to groan. Lo and behold, once the seatbelt sign was off, the mom stood up and quickly/deftly put on a gorgeous (woven) baby wrap with the baby and stood and walked with him for a while. Then the husband took a turn (he also seemed very familiar with how to wrap himself). Nary a whimper from this child over the 10 hour flight. Most people didn't even know there was a baby in our section. As always, you've thought out all the details,…