
Bias Tape is made of fabric strips cut on the bias of the fabric. Typically, you want it to be cut on the true bias (45 degrees to both the weft and selvage sides) so that it has the most stretch possible.
Q: Why do we want bias tape to have stretch?
A: Bias tape is most often used to finish raw edges. These might be single layer or multi-layer pieces. We often use bias tape to go around curved edges, especially in places where it would be difficult to use a standard hem. The bias tape provides a nice, clean edge because it can easily wrap around the edges in any shape, stretching or compressing as needed to provide a crisp finish.
In this post, I'll walk you through how to make bias tape from any woven fabric you have on hand. Why is it unscheduled? Because I forgot to buy bias tape for a project included in Friday's post and figured I may as well make this a standalone for future reference. So, here we are.
Q: What materials do I need to make bias tape?
Woven fabric - check out this great calculator from Quilt Design NW to figure out how big a square you need! In this tutorial, we'll be making 2" strips.
Rotary cutter
Cutting mat
Long quilter's rule
1 Long sewing pin
Iron
Ironing board
Note: Technically, you could also use scissors and cut along marks made with chalk/pencil/what-have-you, but the rotary cutter will be significantly faster.
(Step 1) Choose your fabric and determine how much bias tape you need.
You can use fabric made from any fiber you'd like as long as it's woven (AKA don't use a knit fabric). If you're not sure what kind of fabric you have, hold it up to the light or look closely under good lighting. If it's woven, you'll be able to see the fibers going up and down the fabric as well as across. Still not sure? Try to stretch it. Knit fabrics usually have at least some give along the selvage or the warp directions, while wovens typically only stretch along the bias.
You can use solids, prints, plaids, whatever - as long as it's a woven fabric.
Q: Why can't I use a knit fabric?
A: You can definitely make strips of knit fabric and use them to finish (or bind-off) an edge. Since knit fabric already has a stretch, there's no need to cut it on the bias, just cut some 2 inch (or however wide you need) strips and off you go!
To figure out how much bias tape you need, consider the project. If you plan to bind the edges of a quilt, for example, you'd find the perimeter of the quilt and add about 12-20 inches extra just to be safe. If you're finishing an armscye on a sleeveless bodice, measure around the armscye, add something like 5 inches for error, then double the measurement (because you have two armscyes, I assume).
I always recommend making a bit more than you think you need. This allows for some error and also for some overlap at the beginning and end of the finished edge which keeps the look nice and neat.
(Step 2) Prepare the fabric to be cut.
After pre-washing and ironing your fabric (which you always do, right?), lay your fabric out flat on your cutting table. In the photo examples, you'll see I'm using some scrap fabric. The amount of bias tape you need determines how much fabric you'll need.

Fold one corner of the fabric down to form a triangle. If you've ever turned printer paper into a square (for origami, for example), this will feel very familiar. You should be forming a nice, right triangle with legs of equal length (the legs are the sides that are not the hypotenuse (the long diagonal side)).

Fold one corner of the triangle to meet the other corner of the triangle so that you're essentially folding the hypotenuse in half.
This creates a smaller, still right, triangle where one leg has two folds and the other leg has one fold. The warp or selvage threads should be parallel to the hypotenuse so that when we cut parallel to the legs, we're getting strips along the true bias.
Cut along the hypotenuse to separate your bias tape triangle from the rest of the fabric.
If you find this confusing, you really only need to fold the fabric into a triangle once to get it on the bias. The difference is this method cuts the fabric in half the time (since it's folded twice).

Rotate your triangle so the side with two folds is on your left if you're right-handed. If you're left-handed, you want the two-fold side to be on the right. Basically you want to be able to easily cut your way across with your rotary cutter.
Cut down the side with the double folds as close to the folds as you can get so the folded edges come off and leave you with four, edged layers.
You're now ready to cut the bias strips!
(Step 3) Cut out the bias tape strips

Use your quilters rule to cut your way across the triangle, making 2 inch strips (or whatever width strip you need).
Q: How wide should my strips really be?
A: Depends on what you're doing. A 2 inch strip, after pressing, makes a 1 inch wide strip of bias tape because we'll fold in 1/2 inch on either side to create those clean lines. A 1 inch strip will create 1/2 inch wide bias tape after ironing in 1/4 inches on either side. The rule here is we fold in either side to the center of the strip after it's cut and then press to produce the final strip.
I like 1 inch wide finished tape for most projects (so 2 inch fabric strips before pressing), but you might consider something slimmer for finer/detailed work or wider tape for very bulky edges.
Once you've cut out all your strips, it's time to assemble. If needed, cut the edges of the strips so they lay at 45 degree angles (this will be important in maintaining the true bias along the length of the strip).
(Step 4) Piece your strips together to create one long, continuous bias strip.
This is definitely the trickiest bit, so try one first before pinning the rest!
Match up the edges of the strips so that the hypotenuses of their "end triangles" sit aligned with one another. Important: If you match them up exactly, the strips will be off-set.
Instead, off-set the corners of the hypotenuses by the amount of our seam allowance, 1/4 inch. This means the corners of the triangles will look like they're sticking out a bit over the edges, but that's OK. When you stitch the strips together, you'll see it makes a nice, continuous strip with no jogs to the side. You will have a bit of seam allowance sticking out, go ahead and trim those off.
*Apologies to those using screen readers, I cannot add alt text to a gallery. If you find the descriptions in the paragraphs to be insufficient, please send me a message and I will gladly add more detail.
Repeat this process, matching up all your strips until you've run out.
A word of caution, make sure all your seams are on the same side of the strip. This is actually easier when working with patterned fabric, because it's easy to tell which sides are the right sides of the fabric (always match right sides together). When working with solids, like I am here, I run the strip through my hand and think "seam side down."
An easier way to keep the sides straight (which, of course, I did not think of until typing this up) is to use chalk/pencil/whatever to literally MARK the wrong sides of the fabric so you can tell you're always putting right sides together (marked sides facing out).
(Step 5) Press seams into the tape to finish it.
The goal here is to press in the sides of the tape to form perfect, folded edges which can then be wrapped around a raw edge to finish it off. You could use a hem gauge or ruler to measure in along the whole length, pressing dutifully, OR you could use a single pin and have it do all the folding for you.

This is just the coolest trick and I wish I could say I thought of it myself, but all credit is due to the Relief Crafters of America Facebook group, where someone posted a picture in the comments on a thread about making bias tape for face masks.
To set it up, press in the sides of your tape for the first few inches. For any width strip, you're pressing in to the center (for a 2 inch strip, you're pressing in 1/2 inch on either side). Then, pin the tape to the ironing board so that the tape slides underneath the length of the pin. As it comes out the other side, the pin does the work of forcing the fabric to fold.
*Again, I can't add alt text to a video. If you find the process is not adequately described in the rest of the text, please message me and I will add more detail.
You can see what I mean in this short timelapse video, but it's pretty straight forward once you set up the pin. I pressed a 5 yard length of bias tape in under 15 minutes using this method.
Pro-tips from my own efforts:
As you pull from the pressed side, feed the unpressed side into the pin with your thumb in the exact center of the strip. This helps create the folds evenly along the sides.
If it seems like the folds are off, take a pause to fix them. Re-pin if needed.
Don't melt the pinhead. It's plastic. Seriously, keep the iron away from it.
Use steam and the highest heat your fabric will allow. For cotton, I'm using a cotton setting with medium steam. The heat and moisture really help the tape hold its folds after leaving the ironing board.

Before you leave the ironing board, take a minute to press in the raw edges of the ends of the tape. You'll need to do a bit of trimming here to keep the edges clean.
(Step 6) Store or use your new bias tape!
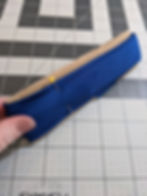
For the example I used in these photos, most of the tape went right into a quilt binding, but I had some left over.
For storage, I cut out a little rectangle from a box hanging out in my recycling bin. I want to say it's ballpark 6 inches by 2 inches, but the exact size really isn't important.
Wrap the tape around the cardboard, pinning in place when you get to the end.
This way, you can toss it in a drawer or box or wherever until you need it again.
I hope you'll get some use out of this how-to post! If you have questions that weren't addressed, please leave them in the comments or send me a message from the About page.
Next week: Baby blankets and why they're one of my absolute favorite things to make even though I don't have any children.